This function allows you to create buttons on the POS Screen that will change Network Printer Settings.
It can help to save time by re-programming printer connections to be used throughout the day in different service environments.
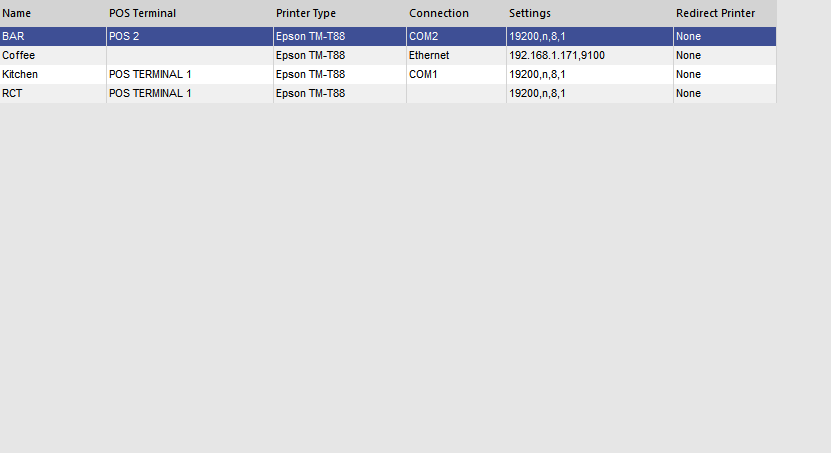
It is assumed that you already have your printers configured in Network Printers.
Each printer is connected to the terminal where required.
In our example, we want to configure a button to change the Kitchen printer jobs to be sent to the Coffee printer, and then configure a second button to change the setting back.
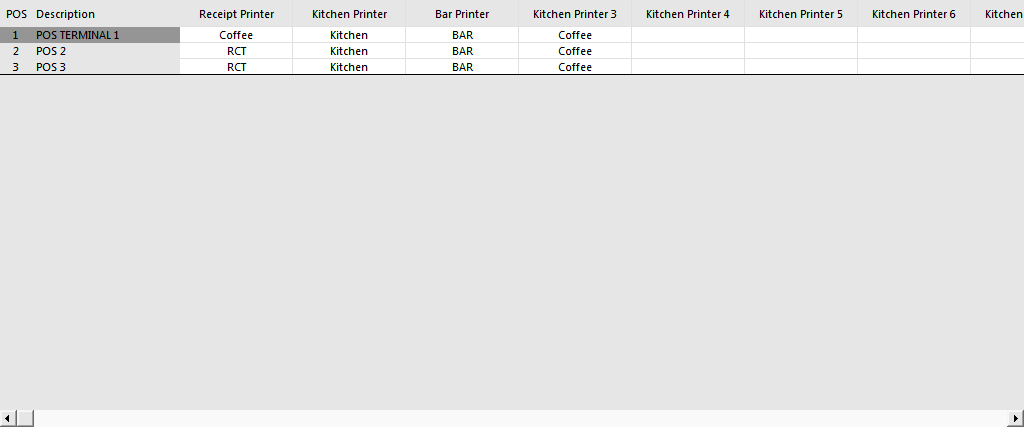
To be able to program the buttons, you will need to know the Printer Name and which KP position is being used.
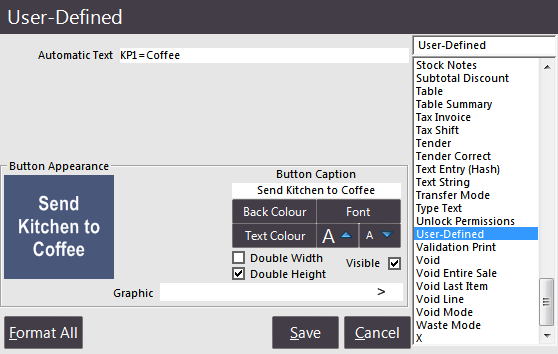
In our example we have KP1=KITCHEN and KP2=COFFEE.
It is important to know these configurations as they will need to be entered on the button program.
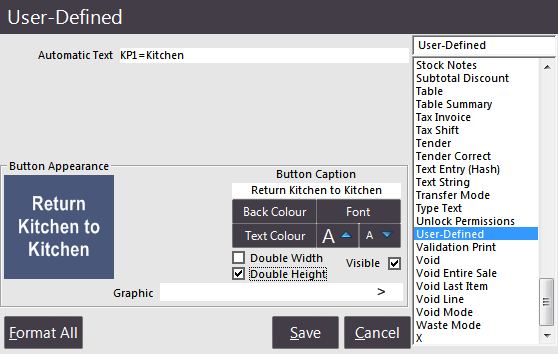
Go to Setup > POS Screen > POS Screen Setup > Layout > Buttons > select 2 blank buttons > User Defined Function.
Automatic Text – KitchenPrinterPosition=PrinterName (No spaces are allowed).
Button Caption – Name the button to reflect the setting it will create. You can name it whatever you wish.
There is no limit to the number of Printer buttons you can create, but it is recommended to keep it as minimal as possible.
It is also recommended to place the buttons in a location where they won’t be pressed accidentally.
On the POS Screen press the button that will change the printer settings to print to a different printer.

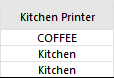
If you go and check the Kitchen Printer settings, you can see that the Kitchen Print Jobs have now been redirected to the Coffee Printer.